
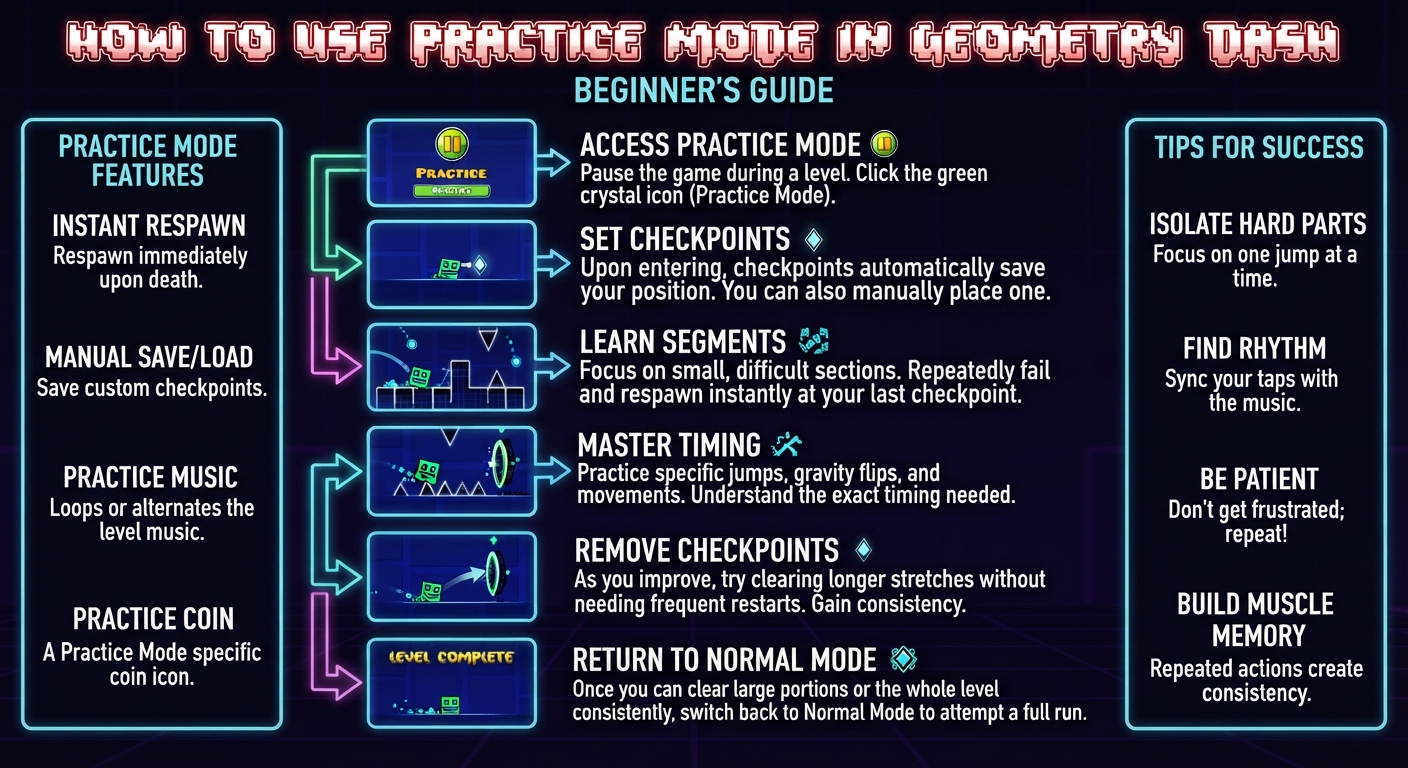
Practice Mode lets you place checkpoints anywhere in a level and restart from them instead of the very beginning every time you die. It doesn’t count toward an official completion, but it’s the main tool players use to actually learn hard levels instead of grinding blind restarts from the start. Whether you are browsing the Geometry Dash APK homepage for new content or tackling official stages, mastering this tool is essential.
» How to Turn On Practice Mode
Inside a level, the practice icon sits next to the normal play button. Selecting it starts the level in Practice Mode instead of Normal Mode. You’ll notice the interface looks slightly different most notably, you now have the ability to place checkpoints as you play.

» Placing and Using Checkpoints

While in Practice Mode, a checkpoint button lets you drop a checkpoint at your current position. If you die after that point, you respawn there instead of at the start. You can place multiple checkpoints throughout a level, and you can also remove the most recent one if you placed it somewhere awkward. These same checkpoints are also utilized by creators during testing phases.
A few practical rules for placing checkpoints well:
- Place a checkpoint right before a section you’re struggling with, not in the middle of it. Checkpoints placed mid-obstacle can put you in a position that’s actually harder to react from than the natural entry point.
- Don’t place too many checkpoints too close together. It fragments your practice into tiny pieces and makes it harder to build the flow needed for a real attempt later.
- Clear old checkpoints once you’ve learned a section, so your practice run reflects the actual difficulty you’ll face in Normal Mode.
» Why Practice Mode Doesn’t Count as a Completion
Completions in Normal Mode require playing the entire level in one continuous attempt without restarting from checkpoints. This is by design it keeps completions meaningful as proof you can actually do the whole level, not just each individual section in isolation. Practice Mode exists specifically to separate the learning process from the actual accomplishment.
» Strategy: Learning a Level Section by Section
The most effective way to use Practice Mode isn’t just restarting near your last death over and over. A more structured approach:
1. Break the level into sections mentally divide it into chunks, often around mode changes or clear visual landmarks.


2. Practice each section individually using checkpoints, until you can consistently clear it without dying.
3. Chain two sections together once each is individually consistent, then three, and so on.


4. Remove checkpoints as sections become second nature, gradually shifting your practice runs closer to what a real Normal Mode attempt will look like.
5. Switch to Normal Mode attempts once you can reliably clear large stretches of the level in Practice Mode without needing checkpoints.

This section-by-section approach builds real muscle memory instead of just familiarity with restarting after the same failure point repeatedly.
» Common Mistakes When Practicing
- Spamming attempts without adjusting anything. If you’re failing the same jump the same way repeatedly, the fix is usually a change in reaction timing or hand positioning, not just more attempts.
- Never removing checkpoints. Some players get comfortable practicing with checkpoints everywhere and never actually test themselves without them, which delays real progress.
- Ignoring visual cues. Many hard levels have subtle visual tells a color change, a camera shift right before a tricky jump. Practice Mode is the time to notice and use these, not just memorize raw timing.
» Frequently Asked Questions
» Conclusion
Practice Mode is what makes hard levels learnable instead of just frustrating. Used well placed thoughtfully, cleared out as sections become consistent, and paired with actual Normal Mode attempts it turns a level that looks impossible into one you can reasonably work through. From there, verifying a level you’ve fully mastered is its own separate process, covered in the verification guide.