
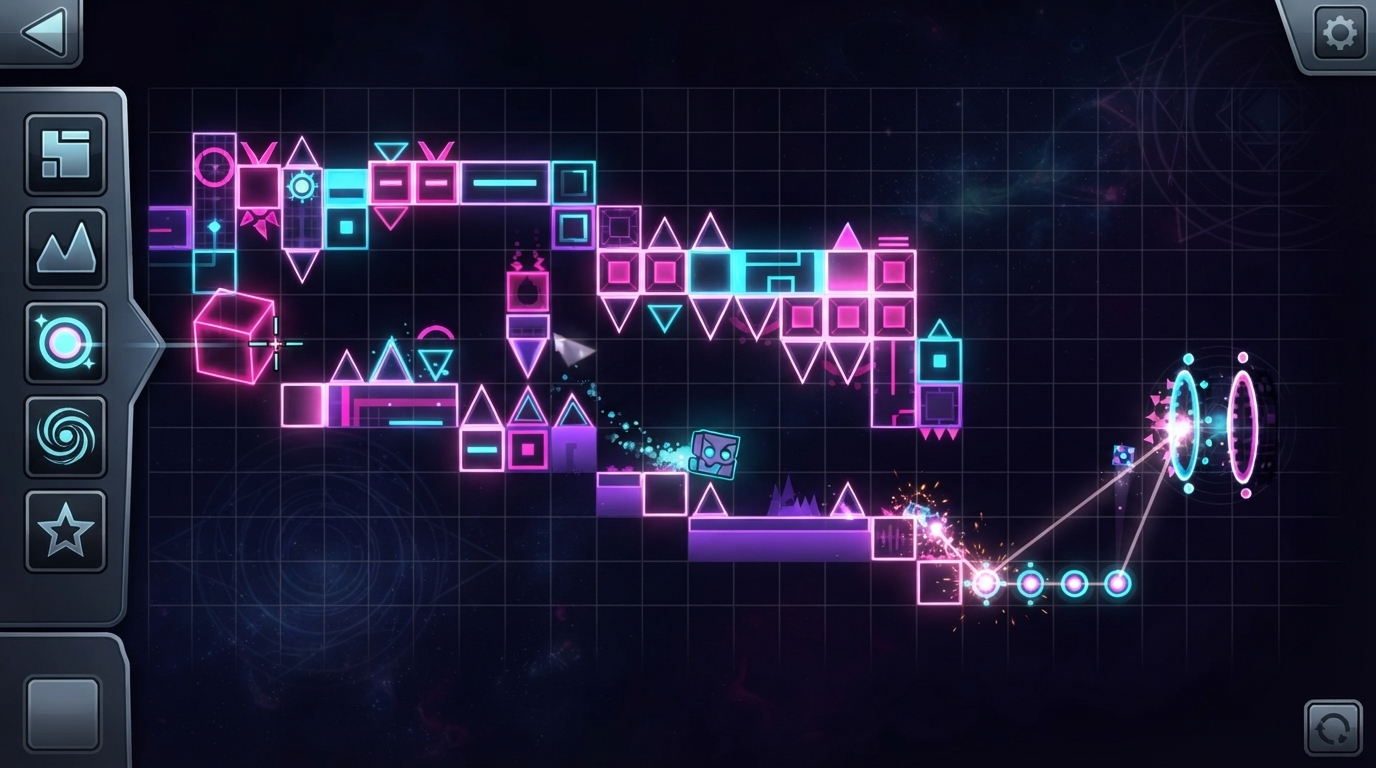
Open the Geometry Dash level editor for the first time and it’s a lot: rows of icons, a grid that scrolls in every direction, and menus inside menus. Most players click around for ten minutes, place a few blocks, and give up because nothing feels like it’s going anywhere. That’s normal. The editor wasn’t designed to be self-explanatory it was designed to be powerful, and power tools take a bit of orientation. If you’re brand new to the game overall, you might want to check out the Geometry Dash beginner guide before diving deep into building.
This guide breaks down what each part of the editor actually does, not just where the buttons are. Once you understand the logic behind objects, triggers, and layers, the interface stops feeling random.
» Getting Into the Editor
From the main menu, the editor is accessed through the “Create” option, where you can either start a new level or open one you’ve already begun. New levels open into an empty grid no floor, no ground texture, nothing placed. That blank grid is intentional; even the ground is just an object you place yourself.

» Build Mode vs. Edit Mode
The editor has two core modes, and understanding the difference early saves a lot of confusion. If you are specifically building on the latest patch, exploring the 2.2 editor features will help you understand version-specific tools:
- Build Mode is where you place objects onto the level. You scroll along the grid, pick items from the object list, and drop them into position.
- Edit Mode (sometimes called Edit Object) is where you select objects you’ve already placed and change their properties color, rotation, scale, or trigger settings.
You’ll switch between these constantly. Build Mode is for adding; Edit Mode is for adjusting.
» The Object Categories

Objects in the editor are grouped into tabs, and each tab serves a different purpose to help you design intentional, not just functional layouts:
- Blocks — solid geometry the player collides with.
- Hazards — objects that kill the player on contact.
- Triggers — instructions that change level properties.
- Portals — change game modes or physics.
- Decoration — purely visual objects with no collision.
New creators often lean entirely on blocks and hazards and skip decoration and triggers. That’s fine for a first level, but triggers and decoration are what separate a functional level from one that looks and feels intentional.
» Layers, Groups, and Z-Order
Once a level has more than a handful of objects, two systems become important:
- Groups let you select multiple objects and treat them as one unit move, rotate, or trigger them together. This is essential for anything with moving parts or synchronized effects.
- Editor Layers (EL) let you temporarily hide or isolate groups of objects while you work, so you’re not fighting visual clutter from decoration while placing gameplay blocks.
- Z-Order/Z-Layer controls what appears in front of or behind other objects, which matters once you start layering decoration over gameplay elements.
None of these are required for a simple level, but almost every level you’ve seen with visible effort behind it uses groups and layers heavily.
» Grid, Snap, and Free Move
By default, objects snap to the grid, which keeps alignment consistent and is the right setting for most block placement. Free Move (toggled with a keyboard shortcut, typically Q by default) turns off snapping so you can place objects at precise, non-grid-aligned positions useful for detail work and decoration where perfect grid alignment would look too rigid.
» Testing What You Build
The Play button inside the editor runs the level from wherever your camera is positioned, not necessarily from the start. This lets you test a specific section repeatedly without replaying the entire level each time.
Test frequently, not just at the end. A single section that plays wrong is far easier to diagnose right after you build it than after you’ve placed another fifty objects on top of it.

» Common Early Mistakes
Understanding what makes a level feel fair in terms of pacing and design helps you avoid these common traps:
- Placing spikes without testing spacing. What looks fair visually can be nearly impossible at actual gameplay speed. Always test at real speed, not just by eyeballing the layout.
- Ignoring the background and ground themes. Leaving default colors on every level makes even well-built levels look unfinished.
- Overusing Free Move for gameplay blocks. Off-grid gameplay objects can create inconsistent hitboxes and awkward jump timing. Save Free Move mainly for decoration.
- Not grouping moving objects. Trying to animate individual ungrouped objects with triggers gets messy fast group first, then trigger the group.
» Saving and Publishing
Levels save automatically as you work, but it’s worth manually saving periodically, especially before testing something risky. When a level is ready to share, publishing options are handled separately from the editor itself that process, along with what verification actually means, is covered in more detail in the guides linked below.
» Frequently Asked Questions
» Conclusion
The editor’s complexity isn’t a wall it’s a set of systems that make sense once you know what each one is for. Objects and hazards build the physical level, triggers and portals control how it behaves, and groups and layers keep everything organized as it grows. From here, the next step is putting these tools to use in an actual level, which is where the beginner build guide comes in.